Light Painting
Well the winter nights are still with us but that doesn’t mean we need to stop taking photographs. In this article I’m going to give you some tips on painting with light.
You don’t need a great many things to give this a go, here’s my basic checklist:
- Camera
- Tripo
- Torch
Now what we need to do is take a long exposure of our subject and use a light source, in this case our torch to ‘paint’ the light onto the items that we want to highlight.
Right the next thing is to get everything set up. You will need to set your camera up to take a basic picture that will help get your exposure correct. None of these settings are set in stone and you will need to adjust them to match your subject. I took the majority of these shots in my back garden and the bathroom light going on and off meant that quite a few got ‘ruined’ i.e. over exposed.
I’d recommend you set up your camera in the light with your initial best guess. You will need to switch the lens to manual focus as the chances are it won’t be able to focus in the dark. Ideally if you have a distance ring on your lens you can set the focus to the correct distance failing that with the lens in auto focus shine the torch on your subject, focus and then turn it to manual.
You will also then need to put your camera into manual mode and turn the shutter release to timer and put your shutter speed up to as long as possible.
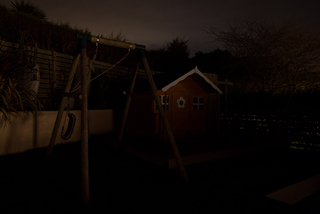
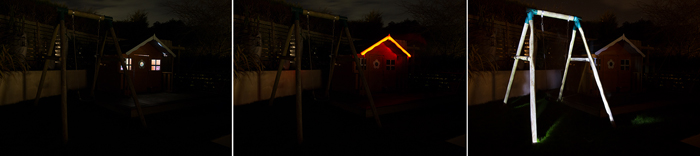
So this was my first shot taken of my children’s playhouse and swing. This was taken at F5.6, ISO 800 with a 30 second exposure. There’s a bit of detail visible and some light in the sky so it’ll do for starters. Ok, now that your camera’s setup on the tripod ready to go, you should have your torch in your hand either off or with your hand over the end. So get ready then press the shutter release and you should then have about 10 seconds to get yourself ready and in position.
Now you may be thinking, won’t I be in the shot? The clever thing about light painting is the camera needs a fair bit of light, over a period of time to create the image, so if you are moving around (and ideally wearing dark clothing) within the picture you should not be still enough for long enough to be visible.
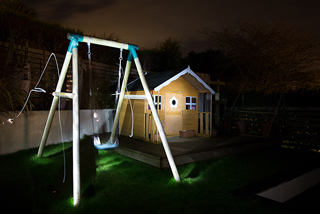
So running around for 30 seconds in the dark with a torch and you should end up with something like Pic 2. You may notice some light trails to the left of the swing. This is where I made the mistake of letting the end of the torch be visible to the camera. Ideally you need to ensure the torch points away from the camera at all times and that you are not blocking the camera’s view of the item you are painting.
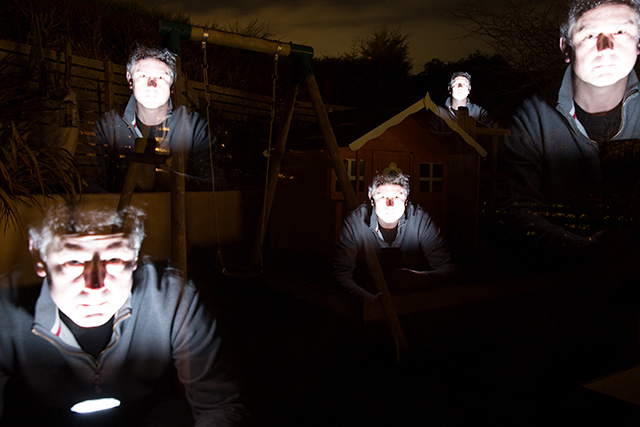
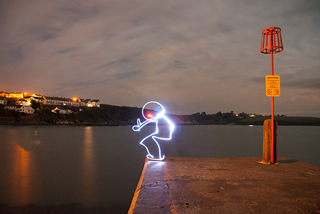
However you can of course use this effect to draw your image into the air. Here the basic setup in Pic 3 was the same and I used an LED torch and pointed it at the camera deliberately and drew in the air. It’s much like waving a sparkler around as a kid and seeing the light trail in the air. The trick is to picture what you are trying to draw and how it will appear from the other side.
The red eye was done with a different torch.
Now all of these pictures (Pic 4) including this one are done as a single exposure. I moved around the scene and then lit my face with a flash of light strong enough to expose my face but not my body. In the bottom left you can see the light source as I didn’t quite aim it away from the camera enough.
So all of the pictures, so far, are single exposures straight out of the camera. Sometimes you want to paint more than you can in the space of 30 seconds. So how do you get around that? Well first you must ensure your camera is on the tripod securely as you are now going to be taking several shots and you do not want the camera to move at all between each exposure.
You then take multiple exposures with each one lighting the scene in a different way.
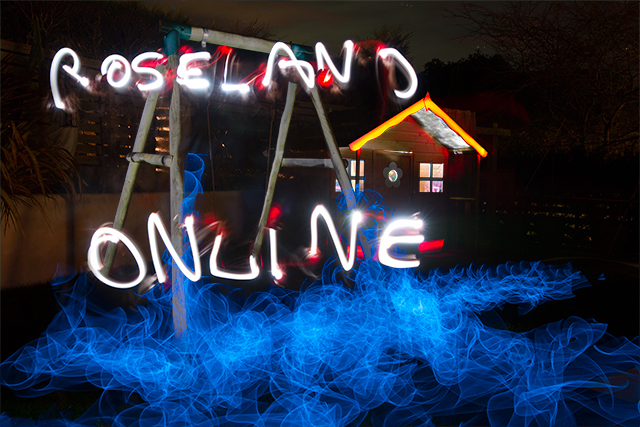
In the pictures below I lit the inside of the playhouse (above), the outside gable with a red led and the swing with a torch. I then opened the first image in Photoshop and placed each of the rest in successive layers above it. You will then need to set all the layers, except the bottom one to use a blending mode of lighten.
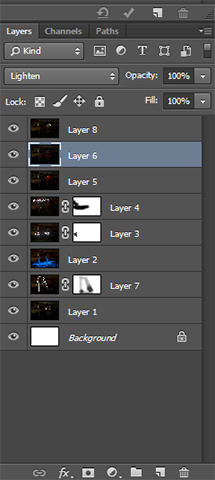 As you might be able to see in the shot of the layers palette I took a few more than the three examples above. Some of the layers I had got a bit carried away with my torch and managed to get streaks of light that I didn’t want in the final frame.
To get rid of these I selected the layer I wanted to edit. Clicked the quick mask button (the rectangle with the circle in the centre) on the layers palette and then using the brush tool painted in black over the areas I didn’t want to be in the final image.
This is a non-destructive way of removing something from the image because if you feel you have gone too far you can simply switch to white and paint back in the area.
You must make sure that you are painting on the mask section not the actual image by clicking on the little white box that appears linked next to the layer you have selected. If you want a quick view of the areas you have painted pressing the backslash key will show/hide it quickly for you.
So with all the items painted and a bit of backwards writing, I thought I’d never get the ‘S’ the right way round, and a little bit of Photoshop tweaking, we end up with our final image (see below).
So have fun with light painting and I’d love to see anything you come up with.
Barney Nicholls