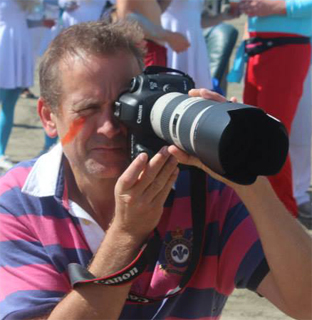
 Hello all my name is Barney Nicholls and I live in Portscatho. I am very lucky to photograph the beautiful area I live in and some of the fantastic events that happen here. I work full time as a software developer but photography has become a very large part of my life.
I have taken pictures as long as I can remember but it wasn’t until I purchased my first digital camera, a Canon EOS 350D, back in 2005 that it started to really grow on me and I now seem to have spent a small fortune on cameras and lenses.
I still have my 350D and I am going to use it to pass on some of the things I have learned that helped to improve my pictures and hopefully inspire you to go out and shoot. All of the pictures in this article, at least those that aren’t of the camera itself, were taken with it. Out of interest having had a quick check on ebay these are available for about £100.
Although the details in this article are about a Canon camera they are equally applicable to any DSLR (Digital SLR).
To start with most of will use the automatic mode as shown in the picture below. In this article I’m going to talk about the Aperture Priority (Av) and Shutter Priority (Tv) modes of your camera.
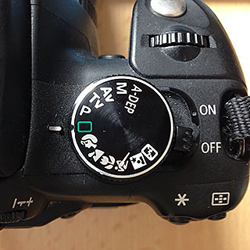 P Program Mode
Everything is set automatically but you can override them
Tv Shutter Priority
You select the shutter speed you wish to use
Av Aperture Priority
You select the aperture you wish to use
M Manual Mode
You set everything
Tv Shutter Priority
With shutter priority you select the shutter speed you wish to use and the camera chooses the aperture to achieve a correctly exposed image. This is particularly useful for either freezing the action using a fast shutter speed or deliberately blurring things by using a slow shutter speed.
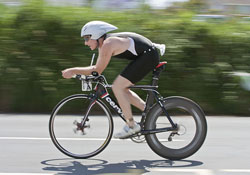 Why would you want to blur something you may be asking, well this shot of a cyclist at the Helston triathlon was taken using a slow shutter speed to blur the wheels and the background giving an impression of speed, if I’d used a fast shutter the wheels and background would be frozen with the spokes visible and it would make the cyclist look like they were standing still.
I set the shutter speed to 1/60th of a second, then as the cyclist came past I panned the camera and took the shot.
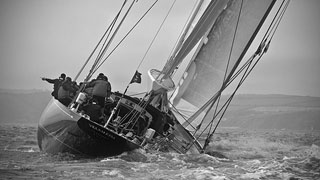
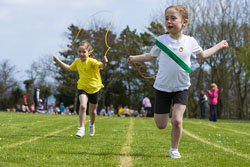
Alternatively you would want to freeze the action and in general I’d recommend setting the speed to 1/500th or faster.
Av Aperture Priority

With aperture priority you set the aperture you wish to use and the camera chooses the shutter speed. This is the setting I use the majority of the time.
The aperture controls the amount of light coming into the lens. The aperture is measured in F stops and slightly confusingly the wider the aperture the lower the F stop number. For example:
F1.8 – Wide aperture lots of light getting in
F16 – Narrow aperture less light getting in
Aperture priority gives you control over the depth of field meaning you control which parts of the picture are in focus. This is probably the most important thing you can do as a photographer.
Have you ever tried taking pictures at an event or somewhere there is a lot of distracting elements in the background. The depth of field can allow you to control what people are looking at within a picture. A wide open aperture (with a smaller f-number, such as F1.8 to F5.6) will allow you to isolate one part of the image and the rest will fall out of focus. When shooting with a wide open aperture the busy backgrounds will fade away and the viewer’s eyes will be drawn towards the subject of the picture.
Another advantage of a wide aperture is that you can take better pictures in low light without resorting to flash (I shall talk about this a bit more later). Using a wider aperture (small F number) in low light works best when shooting portraits as the background will lose detail.
When shooting landscapes you also want to be controlling the depth of field, however we are now trying to get as much of the picture in focus as possible. Ideally the picture should be in focus from front to back. It is very good to put some foreground interest in a landscape which helps draw the viewer into the picture but you still need the background to be as sharp as possible. To help achieve this you will need to use a smaller aperture (higher f-number, F11 to F22).
So what do you do if you’re not shooting landscapes or portraits, well the ‘sweet spot’ for most lenses is around F8. This usually allows a nice sharp picture and is a very good for general photography. Depending on your lens pictures shot at higher and lower apertures may lose sharpness in the corners.
So for starting points with aperture priority try the following:
- Portraits F5.6
- Landscapes F16
- Everything Else F8
Av Aperture Priority and Flash
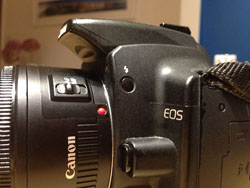 Aperture priority can also be very useful when combined with your built in flash. When you want to use you flash in conjunction with aperture priority and it hasn’t already popped up you can press the button below the flash head on the left with the little lightning symbol. This will pop the flash up ready to use.
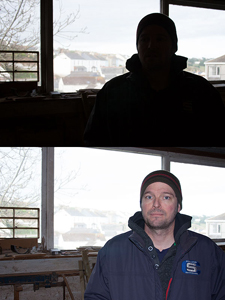 The first problem that we can help with is strongly backlit subjects. Such as when taking pictures of people with the sun behind them and all you end up with is a silhouette of them. If you pop your flash the camera will automatically use it to fill in the silhouettes. As you can see here with this example a strongly back lit person and you just end up with the silhouette, however with the flash popped the picture is much more as the eye sees it.
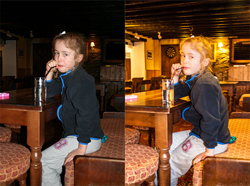 Another time you can use it is when you are indoors and are taking pictures with your flash. When you use the automatic settings on a camera you usually end up with people looking washed out and the background completely disappearing. You will need to up your ISO (the camera sensitivity e.g. ISO 100,200 etc.) and open your aperture as wide (low F number) as possible. Then when in aperture priority with the flash popped up the camera will take an exposure long enough to include some of the background then fire the flash to light the subject. Be aware that you are likely to be using slow shutter speeds so you can still end up with a blurry picture when either you or you subject moves.
 However sometimes you want to catch the movement of your subject such as the sparklers in this picture.
This shot was taken using aperture priority and 2nd curtain sync where the flash fires at the end of the exposure. The default is for the flash to go off at the beginning of an exposure.
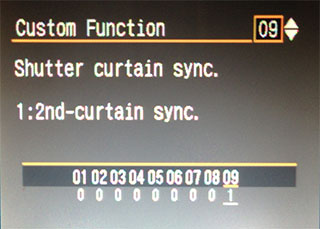 This can be enabled in the custom functions menu and will only be used when the camera is in aperture priority and the flash is firing.
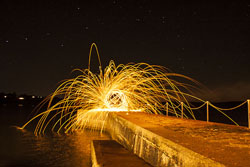 The best thing we can all do is practice, and remember as its digital the only thing it costs to take a picture is your time. This final picture was shot in full manual mode and I’ll leave you to figure out what it is and how I took it.
So get your cameras out and play.
______________________
Thank you for reading my first article I welcome any feedback you have.
You can find my contact details and more of my work on www.bluegreenblue.co.uk


Hey Barney this is really great information and written in a way that any non-expert can understand. I’ve always wondered what those ‘other’ buttons do!
Excellent! Just what I need, info and tips that are easy to understand.
Most informative and easy to understand for all of us have this type of camera but alway leave in on “auto”. Good work Barn.